What is internal vulnerability scanning?
Internal vulnerability scanning is the process of testing for security vulnerabilities from inside a private network. The scanning software is installed inside the network and sends requests to discover and test all of the devices on the network, even if they are not addressable via the public internet.
Ready to start scanning?
Read the tech docs to learn more
External vulnerability scanning is conducted from outside the network over the public internet. The scanner has the same view as an outside attacker. Whereas internal scanning has the view of a an attacker who has gained a foothold inside the network - for example: through phishing, malware, or a compromised device.
Both external and internal scans are important components of cybersecurity programs and required by many certification standards. By running regular internal scans, organizations can:
- Detect vulnerabilities before they are exploited
- Maintain compliance with frameworks such as SOC 2 and ISO 27001
- Gain full visibility into the security posture of internal assets across data centers, offices, and cloud environments
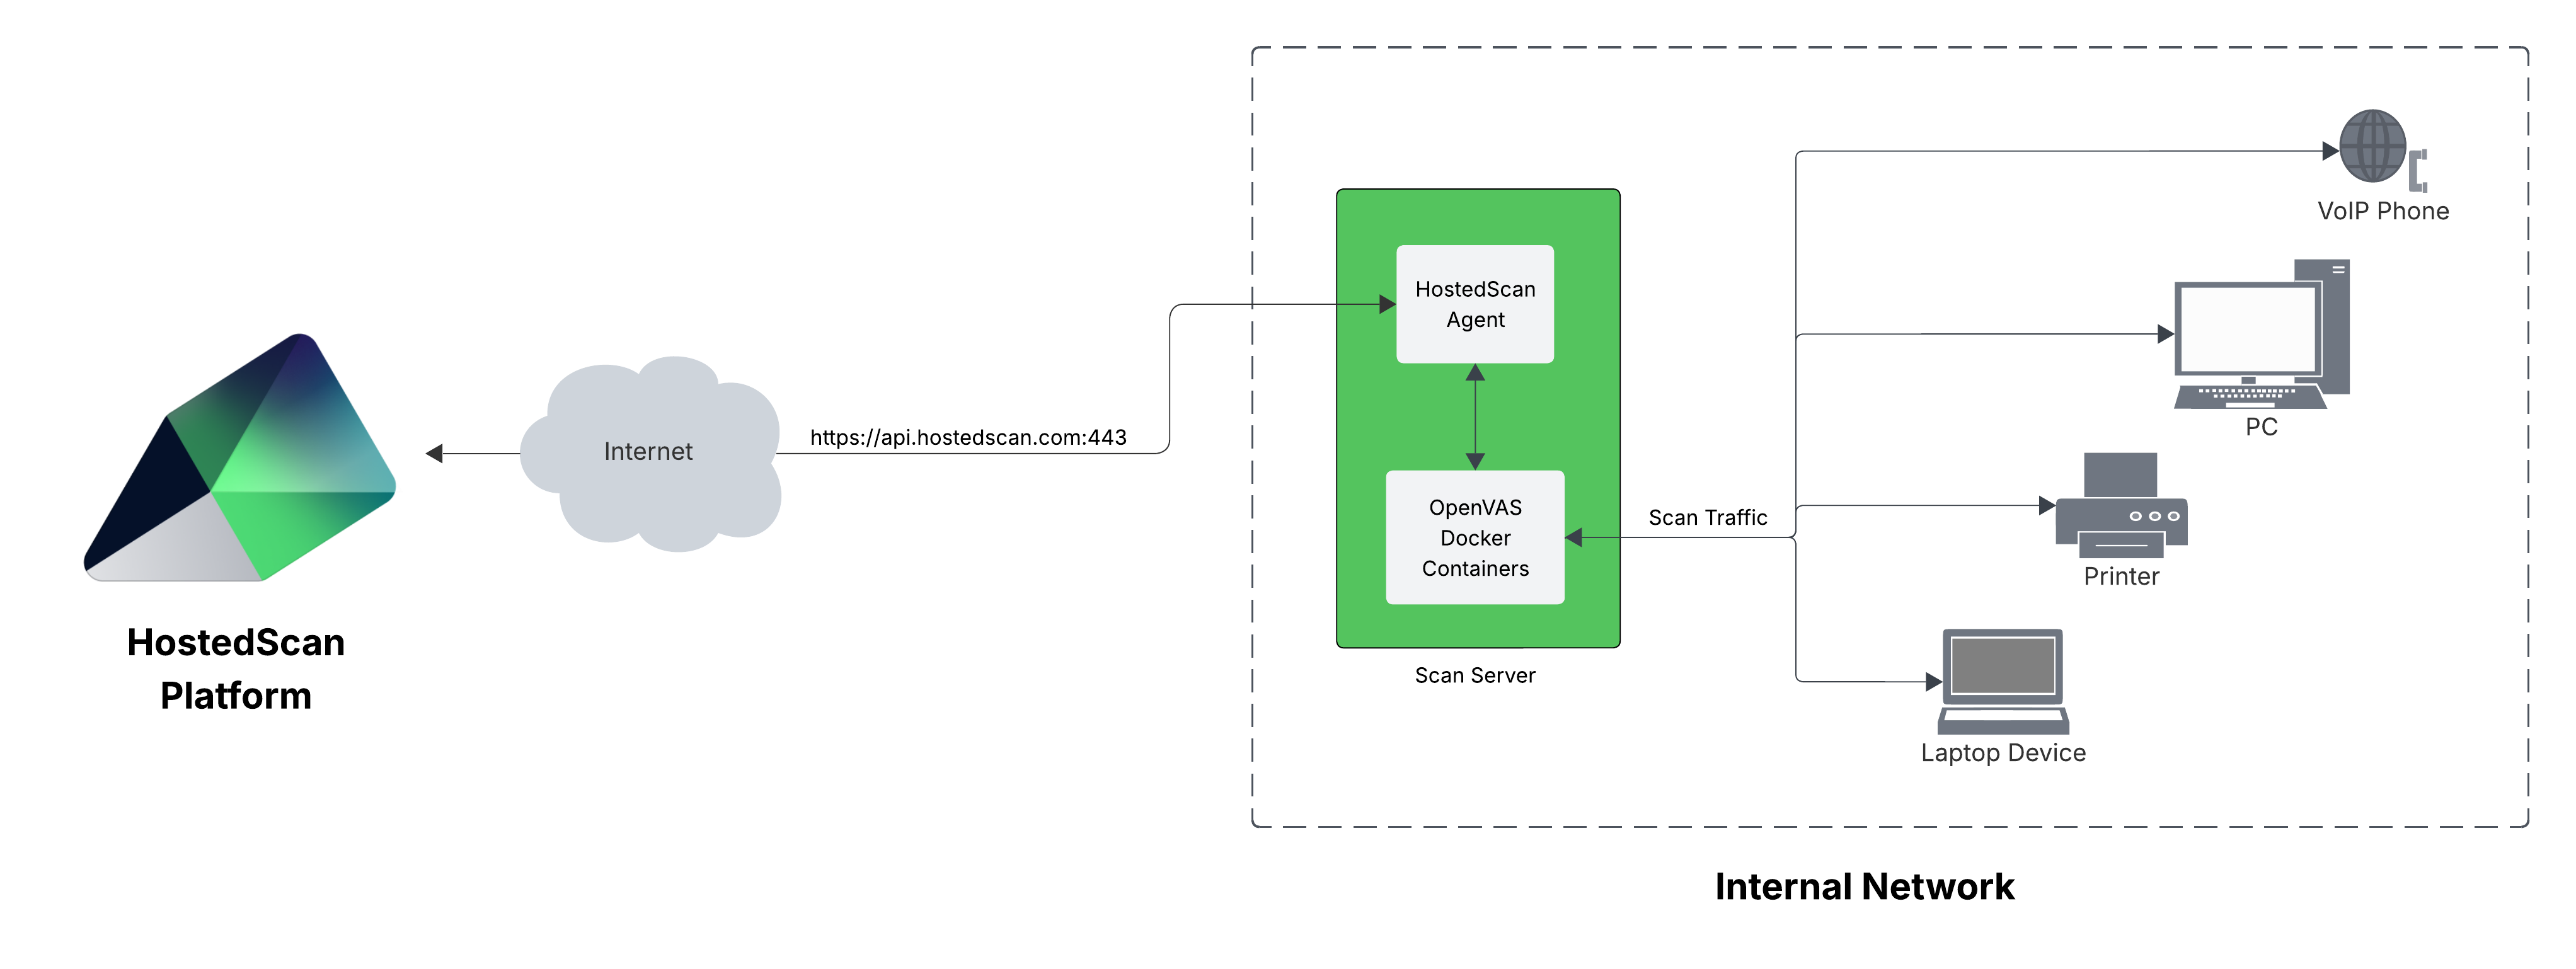
Running internal vulnerability scans with HostedScan
HostedScan provides scalable and secure options to connect vulnerability scanners on internal networks to hostedscan.com for centralized management and reporting. Read the technical documentation to get started!